


Why should you implement JWT authentication in your ASP.NET Core API ?
Let's say you've built you web API, it's cool, it's awesome and it solves a realy niche and tricky problem. Now you want to monitize it, great ! But, wait a minute, if you upload you API to your hosting or to your VPS, then the entire Internet could get access to it and leverage it without having to pay you a dime ! What a shame... But don't worry, through this article, i will walk you through the steps you need to make your API only accessible to authorized users via a user name and a password.
How does it work ?
First, we need to understand two separate concepts: Authentication and Authorization.
Authentication
Authentication is the process by which a user of our API identifies itself in a secure and a reliable way. In other terms, authentication allows a user (a web page, a mobile app, another api...) to login to our API.
Authorization
Authorization is the process by which an already authenticated user accesses the resources exposed by our API. For example, an administrator might have access to every single resource exposed by the API, on the other hand, a more restricted user might have access to only some resources, depending on a set of privileges it might own.
So, how does it work ?
Now that we know what Authentication and Authorization are, we can work out how the process works.
The authentication process in 4 steps
a. The API must expose a special End Point that allows a user to authenticate. Usually, this End Point is called api/authentication
b. The End Point expects a Post request with a user name and a password payload, the End Point then checks the users database to check if the user's credentials are valid.
c. If the user's credentials are ok, the End Point will generate a Token, which is an encrypted string that contains authentication information, and sends it back to the user along with:
- The token expiration date (usually 10 to 15 minutes)
- The user name
- Some profile information And now, the user is considered to be authenticated within the API (at least until the Token expires)
d. If the user's credentials are not valid, an 400 error code is retured back.
One thing to note here, in step c, if the user has a set of privileges, they will be encoded in the authentication Token so that they could be retrieved back later without the need to perform a lookup in the database.
From now on, the authenticated user must show the authentication token whenever it wants to access a private resource within our API, otherwise the API will return a 400 error code to let the client know that it is not authenticated. Furthermore, if the authenticated user attempts to access a resource it is not authorized to access, it will also get a 400 error code.
How to implement Authentication in ASP.NET API ?
First, we need to install these Nuget packages:
Microsoft.AspNetCore.Authentication.JwtBearer
System.IdentityModel.Tokens.Jwt
Then, we need to add an End Point to our API to allow users to authenticate and get the authentication Token. People tend to put this End Point in the User management Controller, I personally prefere to create a dedicated controller to handle the Authentication process. So let's create an new Api Controller called AuthenticationController
[Route("api/v1/[controller]/[action]")]
[ApiController]
public class AuthenticationController : ControllerBase
{
}
Next, we need to implement the Post action that will authenticate users. The action will be named Authenticate and will have two string parameters: username and password
Since we need this action to be publically accessible, we must instruct Asp.Net to not protect this action against anonymous users. To do so, we need to use the special method attribute [AllowAnonymous]
[AllowAnonymous]
[HttpPost]
public IActionResult Authenticate(string username, string password)
{
    // Action content
}
The next step will depend on how you handle and store you users credentials. For most cases, there should be a database of some sort involved, so you will need to check the username and the password sent to the action against your database (or anything else) to decide wether to grant access to the user or not.
To keep this article focused around authentication and to make things simple, we assume that we have a static method called CheckUser in the Users service whise signature is as follows:
public class Users
{
    public static User CheckUser(string username, string password)
    {
        // Implementation details are not relevant
    }
}
And then, in our Authenticate action, we call the Users service method with the given username and password and depending on the result, we'll grant access or not to the user.
Here i show the entire action code. Even though the code itself is self explanatory, i will comment on it.
[AllowAnonymous]
[HttpPost]
public IActionResult Authenticate(string username, string password)
{
    /*
    We first check if the user credentials are valid
    */
    var user = Users.CheckUser(username, password);

    /*
    If the user credentials are not valid, we return a 400
    with an explicit message
    */
    if (user == null)
        return BadRequest("Wrong credentials");

    /*
    We configure the authentication token to be valid
    for only 10 minutes
    */
    DateTime expires = DateTime.Now.AddMinutes(10);

    /*
    We use the JWT library to generate the authentication token
    One thing to notice is the Common.Globals.AuthenticationKey,
    this is an encryption (secret) key that should remain unknown to the
    outside world. Only our application needs to know about it.
    */
    var tokenHandler = new JwtSecurityTokenHandler();
    var key = Encoding.ASCII.GetBytes(Common.Globals.AuthenticationKey);

    /*
    Here, we build the authorization profil via Claims and Roles. We can
    use any strings we need, but keep in mind that these will be encoded
    in the final key, so if our application has hundreds of roles, this might not
    be the ideal way of managing them and we might need to query the
    database to get them.
    The ClaimTypes.Name should always be present and should be
    associated with the user id so the user can be easily identified
    */
    var tokenDescriptor = new SecurityTokenDescriptor
    {
        Subject = new ClaimsIdentity(
            new Claim[]
            {
                new Claim(ClaimTypes.Name, user.Id),
                new Claim(ClaimTypes.Role, user.IsAdmin ? "admin" : "user"),
                new Claim(ClaimTypes.Role, user.CanCreate ? "creator" : ""),
                new Claim(ClaimTypes.Role, user.CanEdit ? "editor" : ""),
                new Claim(ClaimTypes.Role, user.CanRead ? "reader" : "")
            }
        ),
        /* We assign the expiration date */
        Expires = expires,
        /* And we specify the encryption method */
        SigningCredentials = new SigningCredentials(new SymmetricSecurityKey(key), SecurityAlgorithms.HmacSha256Signature)
    };

    /* And we finally create the authentication Token */
    var token = tokenHandler.CreateToken(tokenDescriptor);
    /* The authentication Token needs to be converted to a string */
    string tokenString = tokenHandler.WriteToken(token);

    /*
    And we return a 200 HTTP with the Json containing
    the authentication Token and some useful info.
    We return the expiration date back to the user so that
    it knows when to ask for another Token.
    */
    return Ok(new
    {
        UserId = user.Id,
        Username = user.Username,
        Token = tokenString,
        Expires = expires
    });
}
An important thing to consider here, it is tempting to issue long standing authentication Tokens, please don't ! For security reasons (that are beyond the scope of this article) authentication Tokens must expire as soon as possible, and as a best practice, they should not be kept valid more than 15 minutes. To prevent the clients from storing their users passwords and to prevent them from having to present the login screen to their users every 15 minutes, we use a technique called Refresh Token which consists of the server issuing a refresh token to the client upon authentication. I will dedicate a new article to this technique since its details are beyond the scope of this article.
Generate an encryption key
You can use any string you want to generate the encryption key, the only requirement is that the string should be at least 32 bits long. So any string with a length of 32 would do the job.
Some considerations about the Encryption Key
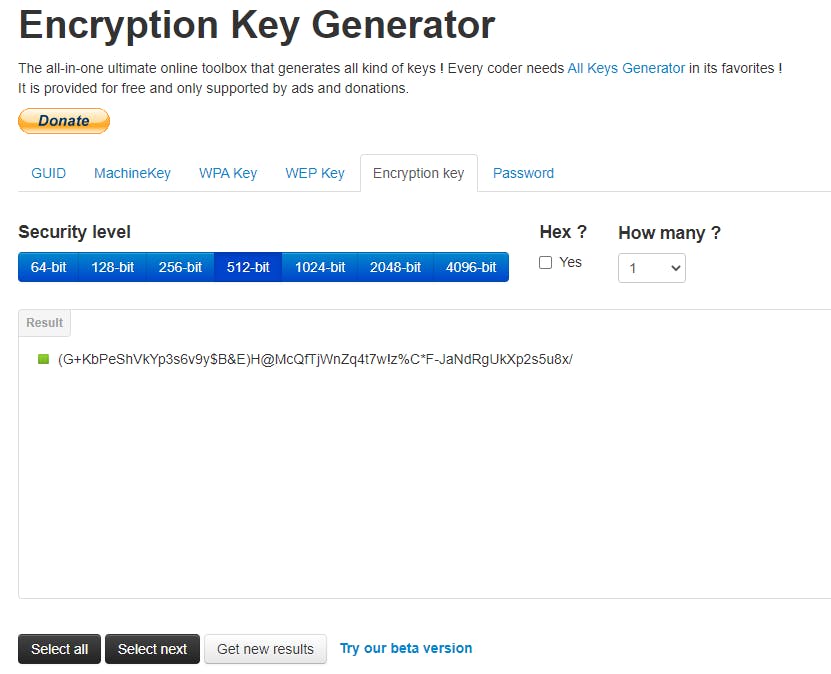
Although the minimum length of the encryption key should be 32 bits, we should always use the longest string we can go with. For security reasons, it is advised to use at least a 512 bits long key, and a 2048 bits is even better. But we need to keep in mind that longer strings means more processing power and thus more processing time. So, a 512 bits key should give us a good security/processing power ratio. To generate an Encryption key, we can type on our keyboard some random characters, digits and special symboles for 10 to 15 seconds or, luckily, we can use a free online tool to generate a beautiful cryptic key for us. You can use this website to generate an encryption key up to 4096 bits long !
Here is a screen shot of the tool:
Configure Startup.cs to handle Authentication
The next step is to add the code required to the Startup.cs file in order for our app to handle the Authentication.
First, we need two using statements:
using Microsoft.AspNetCore.Authentication.JwtBearer;
using Microsoft.IdentityModel.Tokens;
Then, we need to add the following code in the ConfigureServices method:
public void ConfigureServices(IServiceCollection services)
{
    //...
    services.AddCors(); // Cors must be added and properly configured for cross domains access.
    services.AddControllers(); // Don't call this twice !
    //...

    // This must be the same key used in the Authentication controller !
    var key = Encoding.ASCII.GetBytes(Common.Globals.AuthenticationKey);

    // We add the authentication service te the set of services
    services.AddAuthentication(o =>
    {
        o.DefaultAuthenticateScheme = JwtBearerDefaults.AuthenticationScheme;
        o.DefaultChallengeScheme = JwtBearerDefaults.AuthenticationScheme;
    }).AddJwtBearer(o =>
    {
        // This is where the magic happens !
        // We register to the authentication engine events
        o.Events = new JwtBearerEvents
        {
            // And here, whenever the authentication engine validates
            // an authentication Token, it fires up our event handler so
            // we can accept the user or not
            OnTokenValidated = context =>
            {
                int userId = int.Parse(context.Principal.Identity.Name);
                User user = User.GetById(userId); // User is the service querying the database

                if(user == null) // The user must have been deleted or something
                {
                    // The user will get a 400
                    context.Fail("Unauthorized");
                }

                // Ok, the user will get a 200
                return Task.CompletedTask;
            }
        };

        o.RequireHttpsMetadata = false; // Set this to false in development only !!! Should always be true on production
        o.SaveToken = true;
        o.TokenValidationParameters = new TokenValidationParameters
        {
            ValidateLifetime = true,
            ValidateIssuerSigningKey = true,
            IssuerSigningKey = new SymmetricSecurityKey(key),
            ValidateIssuer = false,
            ValidateAudience = false
        };
    });

    //...
}
Then, we need to add some code to the Configure method inside the Startup.cs file
public void Configure(IApplicationBuilder app, IWebHostEnvironment env)
{
    if (env.IsDevelopment())
    {
        app.UseDeveloperExceptionPage();
        app.UseSwagger();
        app.UseSwaggerUI(c => c.SwaggerEndpoint("/swagger/v1/swagger.json", "EzShopApi v1"));
    }

    // Pease note that these calls MUST be in that exact same order

    app.UseHttpsRedirection();

    app.UseRouting();
    app.UseCors(o => o.AllowAnyMethod().AllowAnyOrigin().AllowAnyHeader());

    app.UseAuthentication();
    app.UseAuthorization();

    app.UseEndpoints(endpoints =>
    {
        endpoints.MapControllers();
    });
}
And voila ! That's it. Now we have a private API with a way to control who gets access to it and how to use it !
In the next article, we will build a simple Angular app to consume a private API. We will see how to acquire the Authentication Token, how to securely store it and how to implement a Refresh Token logic to keep the user authenticated for as long as possible without issuing long running Tokens.
Please let me know if this article helped you, and if you have anything to add or to clarify or you can suggest better/other ways of doing authentication in ASP.NET Core API =)
Thank you for reading and keep coding !